Friday, 16 January 2015

BBQ chicken (Siew Pau) Tarts recipe

As requested  I am sharing this recipe. Really good for parties.

BBQ chicken  / Siew pau Filling

350 gm chicken or pork (diced)
15 shallots (chopped)
50 gm green peas

Seasoning ( season the meat)
2 tablespoon oyster sauce
3 tablespoon  sugar
1/2 teaspoon salt
1/2 tablespoon dark soya sauce
1/2 tablespoon light sauce sauce
1 tablespoon corn flour

Method  
1) Heat 2 tablespoon of oil
2) Add shallots & fry till aromatic
3) Add in the seasoned meat fry till thicken.
4) Add in green peas.
5) Leave to cool.


Tarts for savoury filling
250 gm margarine or butter
25gm icing sugar
1tsp vanilla essence
1 large egg
425 gm plain flour
1 tbsp milk powder
pinch of salt

Method
Cream magarine and icing sugar till light. Add vanilla essence, egg, salt
Continue to beat then fold in flour and milk powder. Use hands to knead till into dough

Dough is ready.

Make little balls & put into tart mould. Trim off edges with knife.

Bake for 12 mins , 180° C, depends on your oven.

Once cool, put in the fillings. Then cover up the top with dough. Prick some holes as shown in pictures above.

Bake for 20 mins (180°C) or till desired colour.

Happy baking.

Please do drop me a note if you have any queries.

Friday, 19 September 2014

Evening purse from old cassette & VHS tapes


Found some old cassette tapes & video tapes  which can't be used anymore. Instead of throwing them away, I crocheted the tapes and made these purses.


Thursday, 10 July 2014

Rainbow bag using plastic bags

This is my latest rainbow shopping bag which I have made using recycled plastic bags. My neighbours and friends have been giving me all their plastic bags.  So I decided to sort all the colors and made a huge shopping bag.  

Ta da.. here is the outcome.  Hope you like
my designs.  I even made matching sling pouch for my handphone.


Base of bag

close up of rainbow bag


mediterranean color bag 

Bag, handphone pouch & water bottle
 Please see this link from my previous postings. Click here > How to turn plastic bags into yarns

Do feel free to drop me a note if you have any questions.  I will gladly answer you if I can.

Wednesday, 29 January 2014

Grandma's Loh bak koh (white radish cake)

Chinese New Year is tomorrow.   My grandma used to make Loh Bak Koh (white radish cake) for Chinese New Year.  My dad would fry it for our breakfast on Chinese New Year day.   I am so happy that I managed to learn from grandma how to cook this recipe which my whole family love.   I even kept her steaming tray and has been using this to cook each time.  I miss you, "Mama"!

Well I am keeping this tradition.  As such, I like to share our family recipe with all of you.

 INGREDIENTS:
  • 1 Kg white radish
  • lard (optional) but grandma said it taste better
  • 300 gm pork or chicken (sliced into cubes) or lup cheong (chinese sausage)
  • 100 gm dried prawns
  • sliced mushroom (presoak)
  • 500 gm rice flour
  • 500 ml water
  • salt, pepper 
  • 5 spice powder (optional)
 METHOD

1) Dice lard & meat .  Marinade meat with 1/2 tsp salt & pepper & 1/2 tsp 5 spice powder (optional)
2) Grate the white radish. Squeeze out the water to eliminate the bitterness.
3) In a mixing bowl, put in the rice flour and add in water. Mix till smooth.  Add 2 tsp of salt, pepper and chicken stock (My grandma put ajinomoto)
4) Heat up wok and put in lard and cook till golden brown.  Then add in dried prawns and stir till fragrant.  Add in your meat.  Continue to fry till cooked.  Add in the soften mushroom.

5) Add in radish and keep stirring until radish is soft well mixed.
6) Pour in the flour mixture and keep stirring.
7) Keep stirring till mixture is well combined.  Be careful on fire, do not burn.
8) Pour mixture into a steaming tray. Steam for 90 minutes

You can store this in fridge nicely wrapped.  Then cut out portion that you need and slice into squares.  Pan fry before serving.  Goes well with some chilly sauce.


Sunday, 26 January 2014

More Ang Pow Lanterns

Here is another design  using Ang Pow packets (Red packets)

Materials

  • 30 packets long Ang pow packets
  • 1 tassle
  • staples
Instructions :

1. Fold the angpow into 2 and make notches at the centre.
2. Fold in all corners of angpow packets and make into diamond shape.
Top row 5 angpow vertical
3. Staple on the folding lines of both packets.
4. Continue to staple - total 5 angpow packets together 

2nd row - 5 angpow (horizontal)
5. Add 5 angpow and staple horizontally
6. View from top
3rd row (middle row) 
7. Staple another 10 angpow packets vertically 
Repeat step 3 - 5 (this is to make 4th & 5th row)
8. Turn up side down & join them together  
9 & 10. Staple the corners together
11. Attach a tassle to the bottom.

Drop me a note or comment if you like any further clarifications.

"Gong Xi Fa Cai"

Wednesday, 15 January 2014

How to make AngPow lanterns

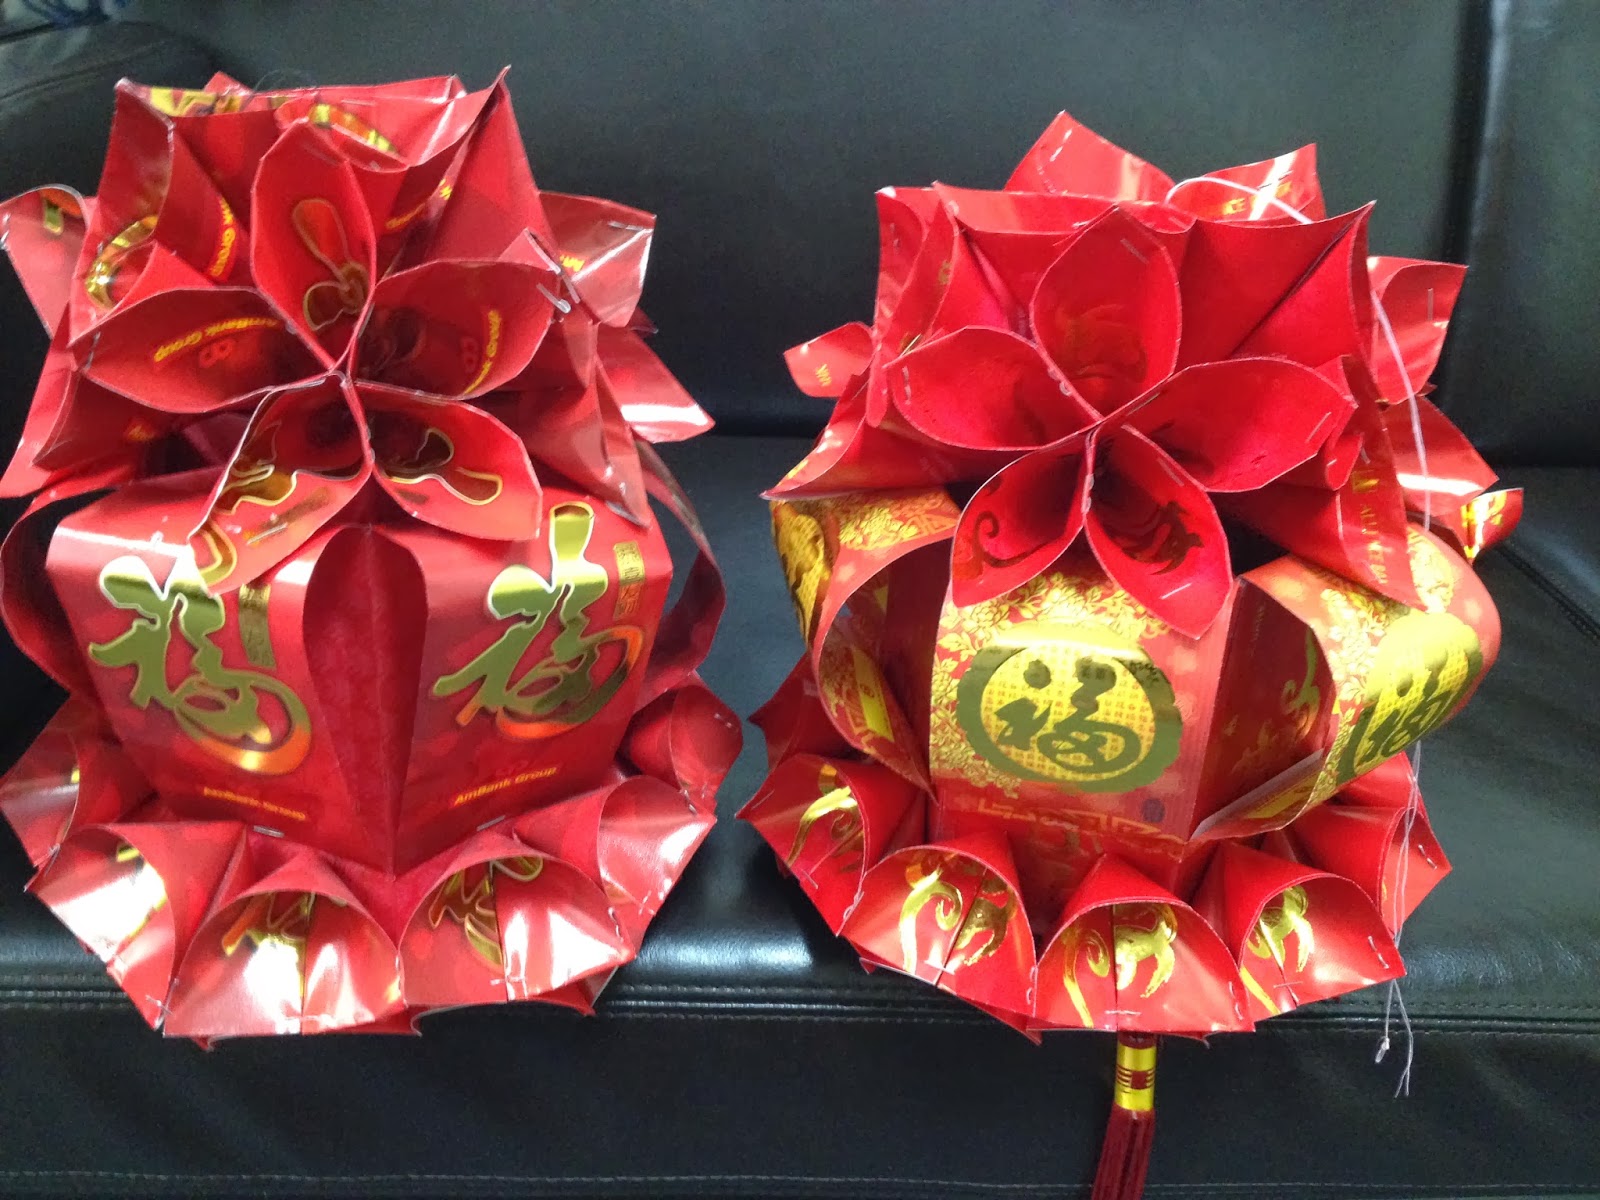
Chinese New Year is round the corner.   I have been clearing stuff and found so many angpow (red paper) packets.  Such a waste to throw them away and I decided to make these lanterns to decorate my office.  Samples of what I have done ...


Instructions on how to make AngPow (Red packet) Lanterns


Materials - Angpow packets, scissors, cellophane tape, stapler


Body  - Part A

1)  Insert 12 cards or any angpow packets into 12 long sized angpows & seal it. This is to create a firm body.

2) Join 2 angpow packets together with cellophane tape. 

3) Repeat process until 6 angpows are tape to centre.

4) Join 6 angpow packets together.

5) Form into a hexagon.

6) Insert 3 into 5 and secure with cellophane tape.

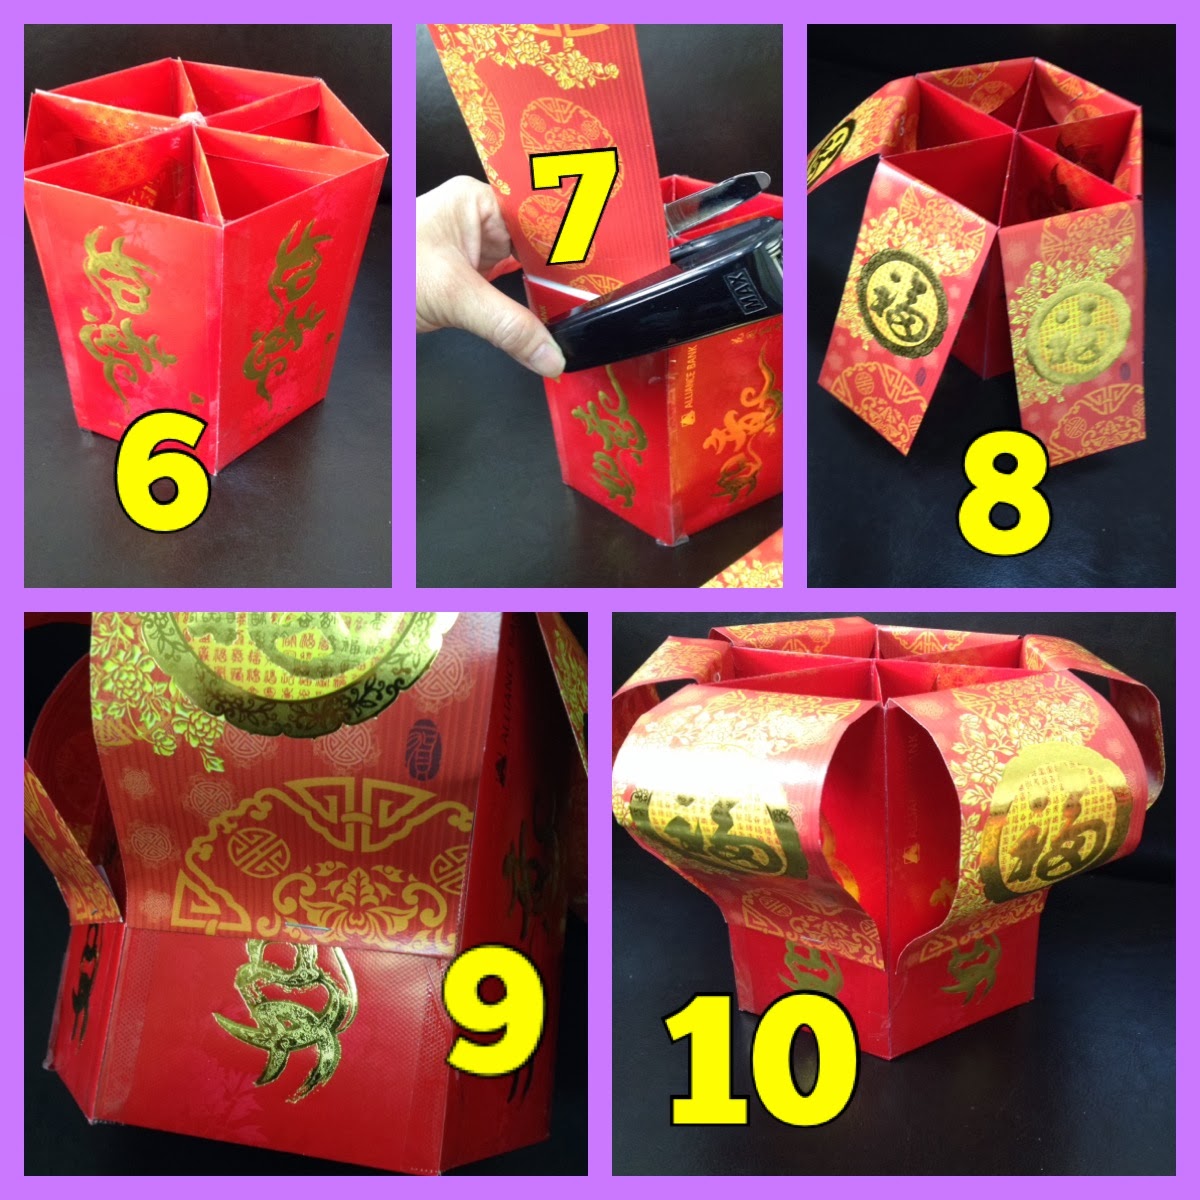
7 & 8)  Staple 6 angpow packets to outside of hexagon.

9) Staple the bottom leaving 1/3 gap of base.

10) This is the main body of lantern


Body - Part B

1) 12 medium sized angpows or cut it as shown.
2) Fold them backwards
3) Press in both side to the middle
4) Staple it at the middle to form a ribbon
5) Repeat and make into 12 ribbons
6) Staple them corner to corner


7) Continue to staple them together corner to corner
8) Staple all 12 ribbons together till you form into a ring
9) Overturn Body A
10) Place the ribbons around the bottom of lantern 
11) Staple to the bottom of lantern

Top Lantern

1) 15 long sized angpow packets. Fold 12 packets into half.
2) Roll in both bottom corners to centre and staple. Make 12 hearts
3) Cut 3 angpow packets into half.
4) Staple 2 heart shapes together and add in the 1/2 red packet.
5) Tuck in &  staple to complete a flower.
6) Repeat process until you have 6 flowers.
7) Staple 2 flower shapes side by side.
8) Add in 3rd flower shape and staple
9) Staple the remaining flower shapes.
10) Attach the whole flower to the main body of lantern with thread
11) Voila!! My completed lantern ready to be hung


Please drop me a note or comment if you need further clarifications.

"Gong Xi Fa Chai" 

Wednesday, 8 January 2014

How to make iPhone / Samsung note purse

Crocheted Plastic Handphone purse

Everyday I take the train to work.  I needed a small purse to sling around my neck so I could put my train card and phone without fumbling for them.  So I decided to make this purse using my old plastic bags. 

Here are some of my creations - fit for I-Phones, Samsung tabs or any phones.  If you have any questions or comments, please feel free to drop me a note


Materials Needed


  • 10-15 plastic bags (cut them into plarns)
  • see link for How to make plarns
  • 1 crochet hook size 7/0 as per pic or size 6/0
  • scissors
  • 1 button
Finish work - (3.5 inch wide x 5 inch height) - perfect for iphone 4 & 5

Method

1)  Make 15 chain stitches (for samsung tabs/note - make 20 chain)

2)  Half Double Crochet (HDC) in 2nd chain from hook in each chain & continue HDC around the corner & down the back side in every chain.

3) Keep crochet HDC in each stitch & do not connect the end of round, continue to HDC in rounds till you reach around 13 -15 rows or as desired.

4)Now do HDC on one side of purse and proceed to do the flap.

5) Chain 2, turn, HDC in each st across back half of purse for flap. Repeat for 3-4 rows.

6) (To make a button hole in centre)  Chain 2, turn, HDC to centre, 1 chain, HDC in each remaining stitch of row.

7) Final row - Chain 2, turn, HDC across to centre empty space, 5 HDC in the empty space, then HDC in each remaining stitch of row 

8) Fasten off and weave ends in between the stitches.

Strap - Option 1) Use shoelace and tie and both sides.

Option 2 - Attach your plarn to the spot where you want to start strap on side of purse next to the flap with a slip stitch. Make 100-120  chain.  Attach strap in stitch next to other end at side of purse with a slip stitch.  Turn and work back up the chain by making HDC around the chain until you get back to the starting of strap handle. Fasten off and weave ends under the side of purse.

I hope you enjoy this and start making them.

God bless!